How to install a kitchen chimney in your kitchen?
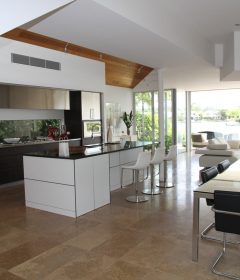
Avoiding the dispersion of odors and greasy vapors is all the more necessary as the kitchen is open to the living room. This is the role of the kitchen chimney installed above the cooking zone.
There are two types of chimneys: with external exhaust or with recycling (carbon filter).
The evacuation to the outside doubles the exposure time, but it remains more effective, both for oily vapors and for cooking odors, and more economical in use.
Because activated carbon filters, which have the ability to retain odors to saturation, are not washable. They need to be replaced every three or four months which ends up weighing on the budget. This is why, if you can evacuate to the outside – which is not always the case, in particular in buildings – do not deprive yourself of it.
Layout and connection
The minimum safety distance between the hob and the underside of the kitchen chimney is 65 cm for electric hobs and 70 cm for gas burners. The kitchen chimney should be as close as possible to its exhaust duct. But do not plan to connect to a pipe already used for the evacuation of fumes (boiler, chimney, etc.) or intended for ventilation. This is strictly prohibited! Use a sheath reserved for this use (Ø 125 or 150).
Otherwise, drill a facade wall or evacuate the roof through the ceiling (single story house without story). At the exit of the roof, provide a socket tile with its ventilation cap. At the exit on a facade wall, a grille with hinged shutters will prevent water from entering the duct. The front can be drilled with a trephine crown, rented for the occasion. Or more simply by making a series of crown holes that you will connect to each other with a flat chisel. Once the cavity has been cleared, it suffices to seal a segment of PVC pipes, which engages, on the facade side, behind a ventilation grid.
The compacted aluminum expandable liner is ideal for connecting the chimneys for Indian Kitchens and the sealed hole in masonry. Flexible, it adapts to all situations and is connected in the wall with a sleeve of the same type. In addition, aluminum is insensitive to heat. However, beware of alcohol outbreaks: remember to move the pan away from the cooking zone during this delicate phase because, a little loaded with grease, a kitchen chimney suction grille can catch fire on contact with the flames and carry the leads to high temperatures.
The assembly of the kitchen chimney
Its assembly begins with a precise outline of the installation axis on the wall, which then makes it possible to identify the fixing points of the body of the kitchen chimney and the chimney.
First, count 65 cm above the cooking surface. Then draw a vertical line up to the ceiling, precisely in the center of the place planned for the kitchen chimney mounting. On this line, then trace the two points of the kitchen chimney support, located 20 cm above the 65 cm already noted.
Place the top flange of the chimney approximately 1 or 2 mm from the ceiling. Then fix the second at a distance corresponding to the holes in the model. All that remains is to fix the body of the fireplace on its supports. Then connect the electrical outlet, then the drain with a flexible aluminum pipe. Finish by setting up the fireplace, here in two parts.
The power supply is provided by a standardized 16 A socket (2 P + E) or a junction box. The line that supplies it must have three 1.5 mm2 conductors and a 10 A fuse protection (or 16 A branch circuit breaker). As a general rule, it is not necessary to go back to the switchboard, since branching out to the lighting circuit is allowed when all the electrical circuits in the room are protected by a 30-mA differential circuit breaker.
Drill through the wall
In the absence of an existing duct, a wall can be drilled with reduced tools (perforator, hammer and chisel). Trace the circle of the duct, then drill close holes (ø 14).
Get a regular lead
Continue with the mallet and the flat chisel, working from the inside and the outside. Clear the entire circumference of the hole and grind with a chisel to obtain a more or less regular duct.
Install sleeve and grid
Engage and seal a cuff in your hole, then install a hinged shutter grille on the exterior wall. The flexibility of the aluminum sheath makes it possible to form a 90 ° elbow to connect the kitchen chimney.
In practice
Allow a maximum of 3 hours for assembly if you already have an evacuation duct nearby, and double if it is necessary to drill the front wall. The installation is within everyone’s reach and poses no difficulty. Thanks to the telescopic chimney system, this type of model adapts to most ceiling heights.
Mark the alignment of the flanges
Start by placing the 65 cm above the cooking surface. Then draw the axis which will be used for the vertical alignment of the various fixing brackets of the body of the kitchen chimney and of the chimney casing.
Mark the location of the flanges
The two flanges which support the body of the kitchen chimney are placed 20 cm higher (i.e. 85 cm from the hob) and 10 cm on either side of the axis. Mark their location.
Mark the holes
The fireplace comes in two parts: a high element fixed on two flanges and a covering which then comes to cover the whole. Position these two brackets on the wall to mark the holes.
Double wall: use dowels
The manufacturer has provided ø 8 mm plugs for the flanges (drilling with 8 mm drill). If your kitchen has a doubled wall (plasterboard), use expansion plugs (Molly type).
Put the flanges in place
Then install the two flanges responsible for supporting the bottom of the kitchen chimney. Place the bracket upwards then, after screwing into the wall, position the adjustment screws.
Electrical connections
Gently engage the body of the kitchen chimney on these two legs and check that the stainless steel sheet passes well behind each leg. Then adjust the height that you can change with the two screws.
Check the lighting
At this point, you can already connect your kitchen chimney to the electrical outlet (with earth connection). Check the correct operation of the lighting and the various ventilation speeds.
Install the flue
In the “recycling” version, the extractor bypass T (supplied with the kitchen chimney) must be used. For our connection to the flexible duct drain, we use a diameter 125.
Connect the kitchen chimney to the duct
The compacted aluminum stretchable duct is ideal for this purpose. Unfold a length slightly greater than the useful distance, then connect the kitchen chimney by simply interlocking.
Install the fireplace
Install the upper part of the telescopic chimney. Position the profile against the flanges and secure using the 4 screws provided. First, remove the protective film covering the stainless steel.
Adjust height
This sliding chimney system allows you to adjust the height without having to cut the sheet metal. Slightly spread the sides of the casing so that they engage behind the first sheet.
Fit the metal filters
Fitting the metal filters is child’s play. Just engage the back of the plate in its groove and fold it forward. Press a little until you hear the “click”, and it’s set!
Conclusion
If you are not a handyman and you absolutely want to avoid mistakes, it is recommended that you hire a kitchen specialist to install your range kitchen chimney.
FOLLOW US