How to Repair Drywall Cracks Easily
Drywall is a popular building material all over the world. Because of its user-friendliness, durability and easy to repair feature, it is becoming more popular day by day.
A common problem of drywall panels is they form crack when forces are applied. So, you will see cracks appearing close to the doors and windows of a room built with drywall.
As they are easy to form cracks, they are easy to repair too. You need to follow some easy steps to get your job done within a few minutes.
4 Easy Steps To Repair Drywall Cracks Easily
1. Preparing Necessary Tools
Every repair work needs some tools and materials and drywall repair is not at all different. You need to have these tools before going into the next step-
- Utility Knife
- Putty knife
- Drywall Mud
- Safety Mask and goggles
Now that you have the necessary equipment, start with the cleaning process. Remove all home appliances from the surface where you are going to work. This will allow you to work freely without any interruption.
Then, wear a safety mask and goggles to clean the surface. Remember, this is an important step. Repairing a surface that is full of dust particles can end up making another repair within a few weeks.
Clean the surface thoroughly and if any loose materials are present in the cracked surface, cut those with a utility knife.
2. Application of Repair Materials
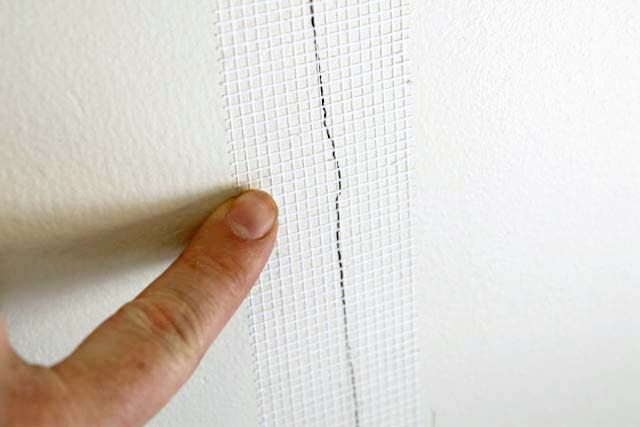
Now apply drywall joint compound with a putty knife on the cracked surface. If the crack is deep and you feel that only joint compound can’t make things up, you can use drywall tape on the surface.
When using drywall tape, make sure to soak it with water so that there remains no bubble in it. Apply a bit of pressure with the putty knife to place the tape on the surface.
And after placing the tape, don’t forget to apply drywall mud again on the surface. Apply even pressure on the surface for a minute or two for making the surface smooth.
Do not apply too much mud on the surface as this can lead to an uneven surface of the wall.
3. Sanding the Surface
When you are done with the above process, you now need to wait for the mud to dry out. Generally, the joint compound dries out within a day and get ready for sanding.
Before starting to sand the surface, you should check whether the surface is dried out completely or not. Humid weather can increase the drying time where dry weather reduces it. So, checking the weather condition can give you a better idea.
As you are 100% sure about the dried surface, sand the drywall surface with a drywall sander. If you have no drywall sander available, The Tooly recommends using a sanding sponge or sandpaper to smoothen up the surface at an affordable price.
When sanding, try to get fine-grit sanders so that you do not end up scratching up the surface. Abrasive grits can scratch the existing paint which will cost you even more effort and money to repair. So, be careful about that too.
4. Painting and Finishing up the Repair
The final stage of the drywall repair work is giving the surface its previous look. For getting the exact color, you should consider getting the exact color shade you have used in your room.
If your house is old, it can happen that the color has been faded. In such circumstances, we recommend painting the whole room instead of the repaired surface for a better look.
For those who want to stick only to the repaired surface, here is a nice trick-
Old faded colors should match a different shade of the same color. You need to measure whether the faded color is deeper or lighter than the applied color. According to the result, get a deep or light shade of that color to minimize the difference.
I hope after reading this article, you would have been able to repair drywall cracks. Thanks for visiting.
FOLLOW US